|
Svendig's Trial of Atlantis - Master Level One Journal
The Trials of Atlantis expansion has ten new master levels. Each master level has several trials that must be discovered, figured out, then accomplished. You must accept the challenge of mastering these trials by speaking with the Arbiter in the Hall of Heroes, who is standing right next to the portal. The Hall of Heroes is the first city the boat takes you to from Aegir. Once you have talked to the Arbiter, you may then port through the blue portal and begin your adventure in Haven of Hesperos.
|
|
|
|
Master Level ONE  Trial #1 Lord Krojer's Test Trial #1 Lord Krojer's Test
Location: 50.5, 36 Anatole
underwater at the bottom of the ocean
Comments on Solo, Grouped, or Battlegrouped:
This is a solo trial and you cannot be grouped. However, you can be buffed and have a healer heal you during battle. The trial happens in an arena, so when you engage you need to back up closer to your healer for heals since you are out of range.
Procedure:
First talk to Lady Farahnaz. She will tell you how the trial works. Then go talk to Lord Krojer and pick on of his champions to fight. He will send the champion you chose to the arena and you must follow him. When the champion stops, talk to him to begin the duel. This is a times event. You don't have to go in order. You must beat one of the champions, then go talk to Lady Farahnaz to complete the quest.
Note: If you beat all of Lord Krojer's champions, you will receive a special reward, a Ring. You can choose between several rings. Each enhances a baseline stat such as constitution.
|
Lord Krojer
|
Back to top
|
|
 |
|
 |
|
|
|
|
Master Level ONE Trial #2 The Thieves
Location: Lornas is at 25K, 28K Mesothalassa
Underwater, at the bottom of the ocean.
The Thieves spawn an various spots. Past spawn locations include:
(4, 16) and (26.7, 24.7) and (26, 42) and (28, 7) and (46, 58).
Comments on Solo, Grouped, or Battlegrouped:
This one is a pain, but soloable or small-groupable.
Procedure:
Start by finding and talking to Lornas. She will tell you to find the thieves, Borjan or Borjad, in a certain direction. Follow that direction to locate the thieves.
Known thief locations are:
(26, 42) or (5, 20).
Once the thieves spawn they roam around a bit. You may have to spend some time looking for them. If you can't find them at all, go back to Lornas and she will give you their latest spawn direction. They appear to be a timed spawn and only remain in the area for a set amount of time. There are also rumors that the boys can stealth and get away from you. They con blue to a level 50 character, so as soon as you see them, have a tank engage and keep agro while the rest of the group shows up. You only have to kill one of the thieves to complete the quest.
|
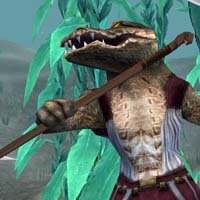
Borjan the Thief |
Back to top
|
|
|
|
|
|
|
|
|
Master Level ONE Trial #3 The Chiefs
Location: 42.4, 2.4 Mesothalassa
Comments on Solo, Grouped, or Battlegrouped:
You don't want to do this one solo, be in a group. No problems with being battlegrouped, both groups got credit for one kill.
Procedure:
Even though the Chief cons blue to a level 50 player, once you attack, he brings about 10 blues down on you and you quickly die without help. You must talk to the Cheif first. He tells you his story, then then you kill him. It is pretty simple and easy to do with a group.
|
Chief |
Back to top
|
|
|
|
|
|
|
|
|
Master Level ONE Trial #5 Fire Island
Location: 40.1 22k on the bridge between Diapreia and Firestorm Island, Anatole
Take the boat to Haven of Volcanus and then swim NW from the dock.
Comments on Solo, Grouped, or Battlegrouped:
This is a single group quest. Battlegroups won't work and you will want a well balanced, full group.
Talk to Ianetor. He is the floating NPC on the bridge. Listen carefully to what he says. Follow the instructions given by Ianetor. Then run onto the island on the west side. Stay off the steps and away from the water. The guards will kill anyone that touches the steps. The Wall of Fire will kill anyone that even thinks of getting close to the water. You must kill these fire giants in order. First kill Sumkaio, then Zopureo, then last kill Aithos. If at anytime anyone in the group agros Aithos, run away from the group and die. Aithos will not agro anyone else if you do this.
To Kill Sumkaio, just melee him and stay away from Aithos. Once you kill Sumkaio, run the other side of the island avoiding Aithos. Do not attack Zopureo, only kill his pets. He spawns fire pets that con orange to a level 50. Zopureo looses health as each pet is killed. Have the healer pull them and melee or PBAE. Finally, kill Aithos using a straight on melee and magic attack. Pick up your loot, because these fire giants drop some nice armor loot. You will also get a gem that defeats the traps for Trial #6. Oh BTW, this is a timed battle. Don't dally or you will loose to the timer.
|
Ianetor
Fire Giants |
Back to top
|
|
|
|
|
|
|
|
|
Master Level ONE Trial #6 Kirkleis
Location: 40.1, 22k on Diaprea Island, Anatole
Comments on Solo, Grouped, or Battlegrouped:
You will need a full group. This does not work solo or with a battlegroup.
Procedure:
You will want the gem from Trial 5 to protect you from the Nedfall Trap spawn. You will also need to have the Belt from Trial #4. All melee players stick to Kirkleis before battle and caster players stand between the columns to avoid the nasty AOE nukes. If you have fire resists, use them. Simply melee this guy and make sure you get the Mirror drop for Trial #10. Only one person in the group will get the mirror. He can also drop some nice armor, so make sure pick it up.
|
Kirkleis |
Back to top
|
|
|
|
|
|
|
|
|
Master Level ONE Trial #7 Rammas
Location: 40.1, 22k on Amphericas Island in Anatole. This is NW of Firestorm Island.
Comments on Solo, Grouped, or Battlegrouped:
You will want at least one full group for this, two is better. Battlegroups work with this trial so you can have multiple groups as well.
Procedure:
You start the trial by placing a player (healer/caster/ranged) on each pad surrounding the domed building. They must stay on the pad. If someone dies, you need to replace that person quickly. Put your tanks inside the domed building. PBAE is great for this place if you have it. There will be several waves of spawns that range from blue to red. Eventually Rammas will will spawn, purple to a level 50 player, and you kill him. He will drop a Mirror for Trial #10.
Suggestions for Casters:
Stand on structure, nuke away aoe/pbaoe etc, when you get aggro quickly move off it. Repeat as necessary.
|
|
Back to top
|
|
|
|
|
|
|
|
|
Master Level ONE Trial #8 Azure Sharks, Hammerhead Sharks, and a Many Facetted Ruby
Location: 14, 51 Deep Sands (bottom of the ocean), Notos
Comments on Solo, Grouped, or Battlegrouped:
This trial requires a group and also works with battlegroups.
Procedure:
Park your team about 10 feet from the surface. Send your healer to the bottom where the sharks are swimming. HEHE, no this isn't a trick to kill your healer. When the healer hits bottom, called Deep Sands, the trial begins. When you arrive, you should see 1 or 2 hammerheads on an azure shark. The hammerhead sharks have a bleed style, and when this bleed style procs it lures all of the hammerheads in the vicinity to zerg the azure. This is why its not a good idea to use bleed styles, you'll get tons of aggro from the other sharks. If you're close enough, you'll even hear the bleeding sound.
Make sure you see that Deep Sands zone message. It's located at 15k, 50k Notos, DEEP DOWN. You'll be able to see the sharks names over their heads when you are in deep sands. Then, you will see a broadcast message indicating you that the sharks go into a frenzy, and one dives down to the sand to pick up the gem. If you don't see the broadcast, don't pull. The shark with the gem will then swim around, and it will glow red briefly as if a paladin TAUNTED it. That's the giveaway. Pull this shark, and he'll drop the many faceted gem. You will want to do this several times to get several rubies. You may need about 3 gems for Trial #10.
Some groups prefer to just pull one hammerhead at a time, then go down as a group to Deep Sands and start the quest and kill. That works too. BTW, you can not use crowd control on the sharks.
|
|
Back to top
|
|
|
|
|
|
|
|
|
Master Level ONE Trial #9 Desmona and her Harpies
Harpie of the Dance (Relic)
Location: Start at 32.6, 46.9 on Desmon'a Island for the /dig portion.
Desmona can be found at loc 25,48 Notos on Desmonas Island next to the rock wall.
Comments on Solo, Grouped, or Battlegrouped:
You will need a full group. I did it with 3 full groups and it was very easy. This trial does work when battlegrouped.
Procedure:
Once on the island, perform a /dig. This one is kinda tricky because there are invisable harpies all over the island. When they attack you, you can not target them. Use /face and swing away. Wait until you get a coin/token that reveals harpies to you. Then go west and kill Desmona.
Desmona can be found at loc 25,48 Notos on Desmonas Island by the rock wall. Move your group to that location and have at least 3 of your group /dig and get a coin. You will get a message, "You just dug up a Desmona Revelation Token." On the way to the next dig site, we were attacked by harpies, and a harpy would take a coin, we would kill them, and when we looted, the player that lost the coin would get it back.
Make sure you pick up Desmona's Crown for Trial #10.
Relic Note: Harpie of the Dance
Once you have that token that reveals the harpies you can go to 25.8, 44.3 and do another /dig. This time you are looking for treasure. Find the treasure and it will spawn the Harpy of the Dance. Only one person needs to dig. The rest can fight off the harpies that keep spawning in the area. The Harpy of the Dance will drop the "Ring of Dances" which is a relic.
|
Desmona the Harpie |
Back to top
|
|
|
|
|
|
|
|
|
Master Level ONE Trial #10 Cetus the Ugly
Location: Cetus's cave is located at 57, 6 in Mesothalassa
Comments on Solo, Grouped, or Battlegrouped:
This has been done with one group.
Procedure:
Warning, the items needed for this quest are not reuseable once used. If you do this trial and fail, but had already used the items during your attempt, you will have to go get those items again.
Cetus cave is located at 57k, 6k in Meso, you need multiple persons with the Red Rubies from Trial #8 to stand in the focus bubble. Attack Cetus when he is down to aprox 40% he will announce he is gonna port to heal himself this is where you /USE the Ruby to prevent him from porting to heal. Make sure you USE from inside the focus bubble. May need to do this more than once so have more than 1 Ruby!! The Mirror blocks one shot from his uber nuke. Make sure tanks have them as well for an easier time killing Cetus.
What you do is take the ruby (if you have 1 group, you'll probably need 2 rubies, if you have 2 groups, 1 ruby should suffice) and have someone waiting by the big ruby above the cage thingy behind cetus. When a message says "cetus readies to go heal" or something of the sort, have the person use the ruby (Im not sure if they put the ruby on the big ruby, or target the ruby and type /use...you can try a few things because if what you try doesn't work and he goes to heal, you can go back up top on the cliff, med up, and try again.
The Crown teleports you to the dungeon entrance.. useful for a rezzer quick getaway if you are all about to die. Not really needed most of the time.
The Ring wipes Cetus' agro list. Can be useful to share the agro around and more reliabel than trying to land an amnesia spell!
The Mirror reflects Cetus's nasty death-ray. Another item that must be used from a pedestal. This item may only be used when Cetus is above 50% health. It generates flying orbs that will attack Cetus for 30 seconds helping to kill him.
The Ruby is the ONLY cvritical one you need and you should have at least one preferably 2 avaialable, with the people who have them as close to the tops of the pillars as they can be and still take part in combat if required. The Ruby prevents Cetus from teleporting back to his lair to heal up. Pure and simple but totally necessary. When he spams his warning, you need a ruby use on top of the pillar and he uses the ruby. Cetus is unabel to teleport and you proceed to beat the snot out of him...
Note about Loot:
Cetus drops five keys that can be used to open treasure chests. Once you right-click on a chest with a key in your inventory, you get a class specific thing. I would recommend that you loto the keys so that you get a mix of loot. He always drops a cloak, called Hardened Cetus Skin. Sometimes it'sa melee cloak, sometime's it's a caster cloak.
|
Cetus |
Back to top
|
|
|
|
|
Back to Svendig's DAOC Journal
|
|


 See Latest Info